A pan-European consortium is working towards an international standard for the commercial manufacture of ionisation vacuum gauges – an advance that promises significant upsides for research and industrial users of vacuum systems. Joe McEntee reports.
Absence, it seems, can sometimes manifest as a ubiquitous presence. High and ultrahigh vacuum – broadly the “nothingness” defined by the pressure range spanning 0.1 Pa (0.001 mbar) through 10–9 Pa – is a case in point. HV/UHV environments are, after all, indispensable features of all manner of scientific endeavours – from particle accelerators and fusion research to electron microscopy and surface analysis – as well as a fixture of diverse multibillion-dollar industries, including semiconductors, computing, solar cells and optical coatings.
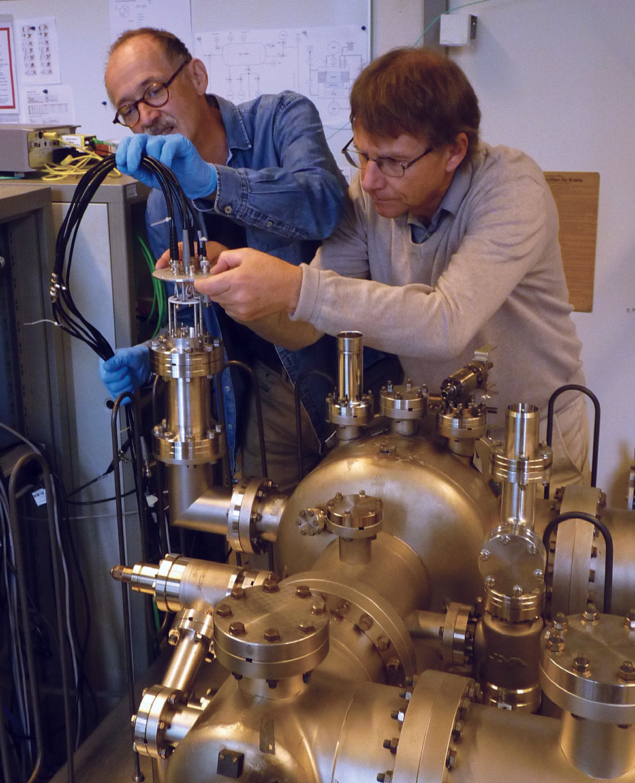
For context, the ionisation vacuum gauge is the only instrument able to make pressure measurements in the HV/UHV regime, exploiting the electron-induced ionisation of gas molecules within the gauge volume to generate a current that’s proportional to pressure (see figure 1 in “Better traceability for big-science vacuum measurements”). Integrated within a residual gas analyser (RGA), for example, these workhorse instruments effectively “police” HV/UHV systems at a granular level – ensuring safe and reliable operation of large-scale research facilities by monitoring vacuum quality (detecting impurities at the sub-ppm level), providing in situ leak detection and checking the integrity of vacuum seals and feed-throughs.
Setting the standard
Notwithstanding the ubiquity of HV/UHV systems, it’s clear that many scientific and industrial users are sure to gain – and significantly so – from an enhanced approach to pressure measurement in this rarefied domain. For their part, HV/UHV end-users, metrology experts and the International Standards Organisation (ISO) all acknowledge the need for improved functionality and greater standardisation across commercial ionisation gauges – in short, enhanced accuracy and reproducibility plus more uniform sensitivity versus a broad spectrum of gas species.
That wish-list, it turns out, is the remit of an ambitious pan-European vacuum metrology initiative – the catchily titled 16NRM05 Ion Gauge – within the European Metrology Programme for Innovation Research (EMPIR), which in turn is overseen by the European Association of National Metrology Institutes (EURAMET). As completion of its three-year R&D effort approaches, it seems the EMPIR 16NRM05 consortium is well on its way to finalising the design parameters for a new ISO standard for ionisation vacuum gauges that will combine improved accuracy (total relative uncertainty of 1%), robustness and long-term stability with known relative gas sensitivity factors.
It’s a design that cannot be found on the market…The results have been very encouraging
Another priority for EMPIR 16NRM05 is “design for manufacturability”, such that any specialist manufacturer will be able to produce standardised, next-generation ionisation gauges at scale. “We work closely with the gauge manufacturers – VACOM of Germany and INFICON of Liechtenstein are consortium members – to make sure that any future standard will result in an instrument that is easy to use and economical to produce,” explains Karl Jousten, project lead and head of section for vacuum metrology at Physikalisch-Technische Bundesanstalt (PTB), Germany’s national measurement institute (NMI) in Berlin.
In fact, this engagement with industry underpins the project’s efforts to unify something of a fragmented supply chain. Put simply: manufacturers currently use a range of electrode materials, operating potentials and, most importantly, geometries to define their respective portfolios of ionisation gauges. “It’s no surprise,” Jousten adds, “that gauges from different vendors vary significantly in terms of their relative sensitivity factors. What’s more, all commercially available gauges lack long-term and transport stability – the instability being about 5% over one year.”
The EMPIR 16NRM05 project partners – five national measurement institutes (including PTB), VACOM and INFICON, along with vacuum experts from CERN and the University of Lisbon – have sought to bring order to this disorder by designing an ionisation gauge that is at once compatible with standardisation while exceeding current performance levels. When the project kicked off in summer 2017, for example, the partners set themselves the goal of improving the relative standard uncertainty due to long-term and transport instability from about 5% to below 1% for nitrogen gas. Another priority involves tightening the spread of sensitivity factors for different gas species (from about 10% to 2–3%) which, in turn, will help to streamline the calibration of relative gas sensitivity factors for individual gauges and multiple gas species.
It’s all about the detail
For starters, the consortium sought to identify and prioritise a set of high-level design parameters to underpin any future ISO-standardised gauge. A literature review of 260 relevant academic papers (from as far back as the 1950s) yielded some quick-wins and technical insights to inform subsequent simulations (using the commercial software packages OPERA and SIMION) of a v1.0 gauge design versus electrode positions, geometry and overall dimensions. Meanwhile, the partners carried out a statistical evaluation of the manufacturing tolerances for the electrode positions as well as a study of candidate electrode materials before settling on a “model gauge design” for further development.
“It’s a design that cannot be found on the market,” explains Jousten. “While somewhat risky, given that we can’t rely on prior experience with existing commercial products, the consortium took the view that the instabilities in current-generation gauges could not be overcome by modifying existing designs.” With a clear steer to rewrite the rulebook, VACOM and INFICON developed the technical drawings and produced 10 prototype gauges to be tested by NMI consortium members – a process that informed a further round of iteration and optimisation.
Better traceability for big-science vacuum measurements

The ionisation vacuum gauge is fundamental to the day-to-day work of the vacuum engineering teams at big-science laboratories like CERN. There’s commissioning of HV/UHV systems in the laboratory’s particle accelerators and detectors – monitoring of possible contamination or leaks between experimental runs of the LHC; pass/fail acceptance testing of vacuum components and subsystems prior to deployment; and a range of offline R&D activities, including low-temperature HV/UHV studies of advanced engineering materials.
“I see the primary use of the standardised gauge design in the testing of vacuum equipment and advanced materials prior to installation in the CERN accelerators,” explains Berthold Jenninger, a CERN vacuum specialist and the laboratory’s representative in the EMPIR 16NRM05 consortium. “The instrument will also provide an important reference to simplify the calibration of vacuum gauges and RGAs already deployed in our accelerator complex.”
The underlying issue is that commercial ionisation vacuum gauges are subject to significant drifts in their sensitivity during regular operation and handling – changes that are difficult to detect without access to an in-house calibration facility. Such facilities are the exception rather than the norm, however, given their significant overheads and the need for specialist metrology personnel to run them.
Owing to its stability, the EMPIR 16NRM05 gauge design promises to address this shortcoming by serving as a transfer reference for commercial ionisation vacuum gauges. “It will be possible to calibrate commercial vacuum gauges simply by comparing their readings with respect to that reference,” says Jenninger. “In this way, a research lab will get a clearer idea of the uncertainties of their gauges and, in turn, will be able to test and select the products best suited for their applications.”
The measurement of outgassing rate, pumping speed and vapour pressure at cryogenic temperatures will all benefit from the enhanced precision and traceability of the new-look gauge. Similarly, measurements of ionisation cross-section induced by electrons, ions or photons also rely on gas density measurement, so uncertainties in these properties will be reduced.
“Another bonus,” Jenninger notes, “will be enhanced traceability and comparability of vacuum measurements across different big-science facilities.”
“The results have been very encouraging,” explains Jousten. Specifically, the measured sensitivity of the latest model gauge design agrees with simulations, while the electron transmission through the ionisation region is close to 100%. As such, the electron path length is well-defined, and it can be expected that the relative sensitivities will relate exactly to the ionisation probabilities for different gases. For this reason, the fundamentals of the model gauge design are now largely fixed, with the only technical improvements in the works relating to robustness (for transport stability) and better electrical insulation between the gauge electrodes.
“Robustness appears fine, but is still under test at CMI [in the Czech Republic],” says Jousten. “Right now, the exchange of the emitting cathode – particularly its positioning – seems to depend a little too much on the skill of the technician, though this variability should be addressed by future industrial designs.”
Summarising progress as EMPIR 16NRM05 approaches the finishing line, Jousten points out that PTB and the consortium members originally set out to develop an ionisation vacuum gauge with good repeatability, reproducibility and transport robustness, so that relative sensitivity factors are consistent and can be accumulated over time for many gas species. “It seems that we have exceeded our target,” he explains, “since the sensitivity seems to be predictable for any gas for which the ionisation probability by electrons is known.” The variation of sensitivity for nitrogen between gauges appears to be < 5%, so that no calibration is necessary when the user is comfortable with that level of uncertainty. “At present,” Jousten concludes, “it looks like there is no need to calibrate the relative sensitivity factors, which represents enormous progress from the end-user perspective.”
Of course, much remains to be done. Jousten and his colleagues have already submitted a proposal to EURAMET for follow-on funding to develop the full ISO Technical Specification within the framework of ISO Technical Committee 112 (responsible for vacuum technology). In 2021, Covid permitting, the consortium members will then begin the hard graft of dissemination, presenting their new-look gauge design to manufacturers and end-users.


